

We will continue with the scene we developed in the previous tutorial on HDRI setup. To organize materials, lights, cameras, and textures, Maya uses an interface called the Hypershader. To access this window go to Window> Rendering Editors > Hypershader . You should see a window like the one below.

Mental Ray has its own set of specialized shaders and these can be accesed by clicking the "Materials" button under the "mental ray" header in the far left panel of the Hypershader. Now a list of mental ray specific materials appears in the center panel. We are going to begin with the "mia_material." By clicking on the material you will see a new instance of the material appear in both the top and bottom panels on the far right, and its settings become available in the attribute editor. The top half of the far right panels in the Hypershader displays all of the materials in the scene, while the lower panel displays a materials connections (we will explore this further later).

The mia_material is designed to represent hard surface materials (plastics, metal, glass, wood, concrete). We will focus on two main areas. The first is the "Diffuse" section which is where you set the base color of the material and its roughness. The second is the "Reflection" section where you control reflection strength, color, and glossiness (blurring). Lets start by exploring some of the presets. If you click on the "Presets" tab a menu of material presets appear. Lets select a chrome material first. Then apply it to one of our objects by selecting the object, then right clicking on the material in the Hypershader and click Assign Material to Selected.


Next lets create a glossy white plastic material for the ground plane to explore glossy reflections. Start off by creating a new mia_material and selecting glossy plastic in the Presets menu. Lets also adjust it's diffuse color to a pure white by clicking on the color next to diffuse and setting it to white.


To create blurry reflections we need to turn up the Glossy Samples in the Reflection settings. I will set it to 8 which will activate blurriness. I will then render three tests setting the Glossiness slider to .35, .67, .9 . You will see blurriness increase with lower number as well as image noise (which can be mitigated by higher samples, though this slows the renderings).


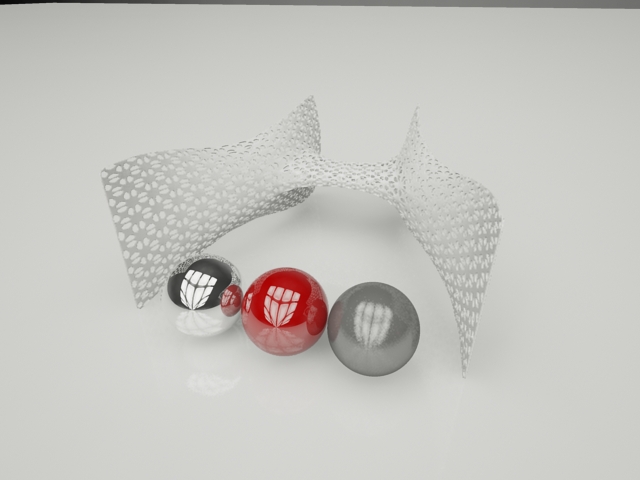
To finish out the materials I will create a few more mia_materials for the different objects.

The image is very dark still, so we can create a physical camera lens to adjust the brightness. To do this first select the camera (view>select camera, in the view panel) so we can see its settings in the attribute editor.

Scroll down in the shape tab to the mental ray settings and click the checkerboard next to Lens Shader. When the Create Render Node window opens click the Lenses section under Mental Ray, then select mia_exposure_photographic.

This will open the exposure settings in the attribute editor. The first adjustment we will make is to the Cm 2 Factor. This sets the conversion factor of energy in the scene into color value. By default it is set to 1 which will render the scene black. I have set mine to 3000, though this will vary based on individual HDRI maps. I also set my Camera Shutter to 3.

No comments:
Post a Comment